Sunday, 10 October 2010

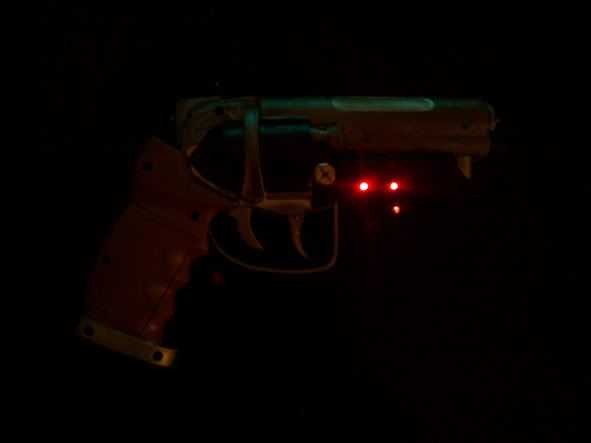
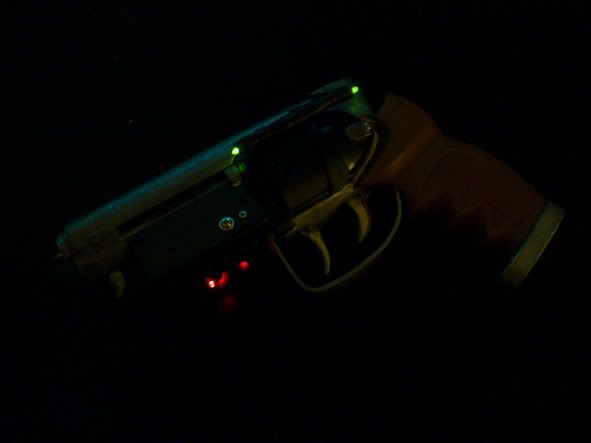
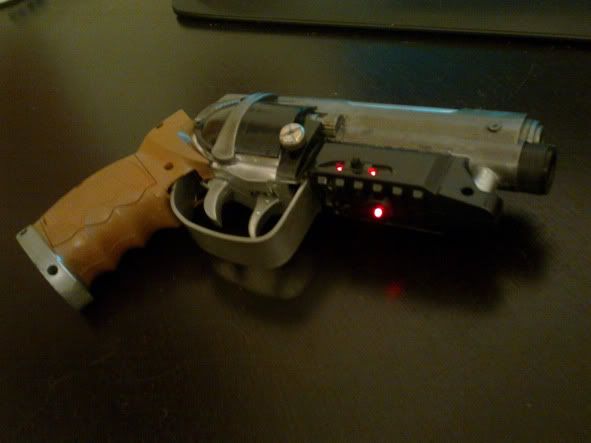
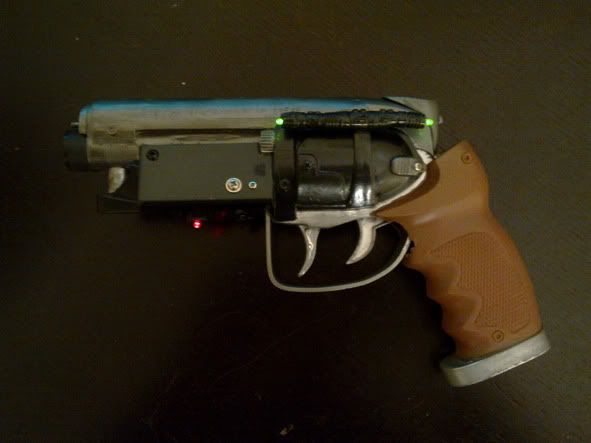
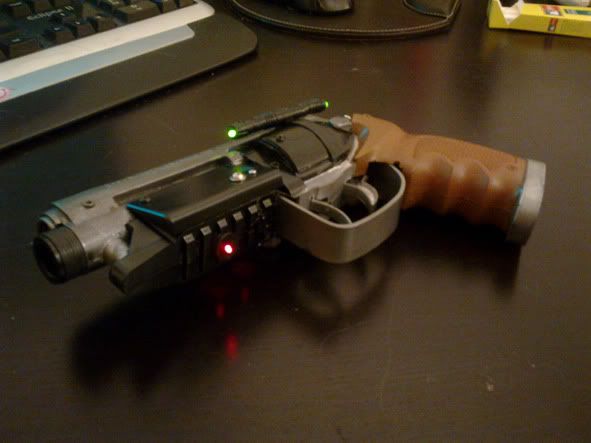
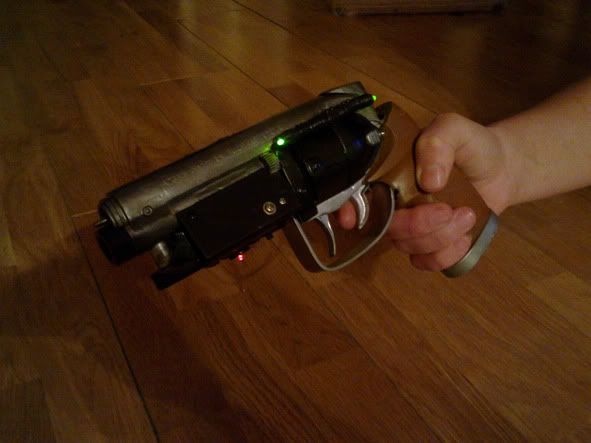
Blade Runner Blaster final steps, lights are in!!!....oh joy of joys!!!

So after spending the afternoon in Maplins perusing thier sumptuous displays of circuit boards, resistors and micro switches myself and my electronics consultant rushed back home to build the guts of the beast.
Well, I drank tea and wondered how...

the components used were 5 LED's 3 red and 2 green, some wiring and the old toy's original circuit board as a base for the circuit of lights, a micro switch secreted, quite clumsily (needs repairing and glueing), some solder and a hell of a lot of cursing and sweating.

However finally the last 10% is coming about, I've improved the barrel tip (needs painting), found a foresight (also needs painting and attaching) and added rolls of coins to give the weapon some realistic weight (about 2kg I think)

so on with the pics...

Sincerest gracias to the Spanishdemoness for her electricalised genius.
I ARE NERD
Respect
P.

Friday, 8 October 2010

this one keeps running...Blade Runner Blaster a' continuacion

Things are grinding along slowly at this stage, I've been considering options for the final stages and am waiting on my electronics genius to help me make up the LED's that will be in the final piece.

One of the gaping errors (literally) that I have been pondering is the massive hole left at the back of the upper receiver after I cut off the excess plastic....

ugly huh? not to mention low grade and uncraftsmenlike..tut, tut. However thanks to my dear old friend and yours FIMO I managed to sculpt a piece that slots (quite nicely) into the Undeckardlike gape. It has the added bonus of looking a bit..I did say a bit..not much, like the receiver on the real prop.

real prop

My fimo bodge job

and in place....


Now..the problem I have with this, is that it tends to lend to much length to the whole pistol. The charm for me is that the PKD Blaster is stubby and ugly...so that's still a ponderer. I've made a flatter piece to cover the gap but I'll decide which one wins when th electronics are in place and it's ready to be assembled finally.

The other dilemma I've had has been the handgrips. On the movie version the handgrips are a lovely semi transparent amber coloured plastic. I don't have that option obviously but I also don't really want just a regular brown wood style handgrip. So after much experimenting and about a thousand coats of different browns, tans, oranges etc..I finally stumbled on this cool rubbery effect by mixing rust coloured pigment powder into the still damp paints.


I may still experiment further with a coating of laquer or some sort of varnish..but again that can wait for now.
In other news..this dropped on my doorstep yesterday...

It's a cheapo kids toy replica of an AR15 or M4 assault carbine used by troops today in Iraq and Afghanistan as well as, I'm sure many other delightful locations.

with a quick bit of attention from my screwdriver, some masking tape, spraypaint and some more pigment it took me less than 24 hours to turn it into a nice realistic looking piece of kit


with all the nasty flashing lights yanked out and replaced with rolls of coins to add weight, and all the transparent plastic parts well and truly sprayed over the final result is this...


Should be handy when the zombie apocalypse happens..well as soon as I can figure out how to turn plastic into metal and magic up the working innards of a real gun.

Still, useless as it is it's a nice addition to the Baronial prop armoury....

as ever, more to come....
I ARE NERD
Respect
P.

Sunday, 3 October 2010

Vintage Star Wars Goodness...

More goodies from the garage! A whole box full of classic vintage Star Wars figures!!..I love 'em but after 11 years without them and taking into consideration my house is FULL of Star Wars toys not to mention other toys I've decided to let some go via ebay to let somebody who has space give 'em some loving...

Here's what's up there right now....


if you want them, go get 'em!!!

There'll be more coming over the next few days and weeks so keep your eyes peeled.
I ARE NERD
Respect
P.

Wednesday, 29 September 2010

UPDATE! progress on the Bladerunner Blaster

Now things are reaching the last stages of modification, I've given everything undercoat and topcoat (gun metal and metallic black gloss) ready for the weathering and ageing paint effects (need to research that a bit)
All except for the handgrips which I've given a quick couple of coats of dark brown enamel but they need something else I feel.something a touch more special but well..all in time.

I've gone one step further in authenticity and painstakingly (and rather shakily) etched some markings into the top barrell section....
they aren't anywhere near as clean and 'stamped' looking as I'd hoped for but from a short distance they look convincing enough, which is really the best I can hope for with the finished product anyway!

Now the time has come for adjustments so that everything fits together seamlessly, I want to install electronics/battery and on/off switch then put the two halves together and plasto over any seams or gaps. Finally giving everything a last coat of paint to mask the plasto fills.

The trigger guard needs to be fitted a bit better to allow full closure of the halves as you can see below...


It probably means a bit of plastic shaving rather than the metal as it's easy to just scalpel little bits off and adjust to fit snugly.
Overall, despite some minor niggles caused by my impatient handling of still sticky paint and some other inconsiquental aesthetic issues, I'm quite pleased with how its all coming along.

whaddya think so far?...still lots of work to do!!!


In other tenuously related news I found this in a local poundstore the other day....Robocop anyone?


....More to follow....
I ARE NERD
Respect
P.

Sunday, 26 September 2010

Hidden Treasures of the past - Superman Storyboards!!!!!

Whilst clearing out some 11 year old storage boxes, amongst the many treasures discovered was these incredible movie relics.
Given to me as a 6 year old nerd in training samples of storyboard from the first Superman movie from '78 and a call sheet for the day's shooting.

Golden memorabilia! I will be looking into getting high quality reproductions for sale at some point in the near future, if you want some just drop me a line...


More Bladerunnery goodness due imminently....

I ARE NERD
Respect
P.

Thursday, 23 September 2010

One small step for man, a giant leap for nerdkind..Bladerunner Blaster chronicles

There's still something niggling me about this toy template I'm working with..sure it's 65% similar to Deckards gun but that remaining percentage..it bothers me..so today in as I rummaged in my box of bits for inspiration I pulled out an old Maplins AA battery box...I gazed it it, then at the scalpel...then back at it..and back at the scalpel..lines were forming in my mind and then it struck me - bravado, "go on cut it" said my mind. "I don't mind if you do" said the battery box very understandingly and yielded to the sacrificial blade....

and so it is done.
Now the left side looks much more different to the right, the bulge of the Steyr magazine is there..with some careful application of filler it will be perfect!

There have been some aesthetic losses tho, namely the twin red led's that were going to appear on that side, but I figure it's a trade off for now. bulge for blink, it's all androids and replicants really.


the added bonus is, of course, that the new fitting covers my plasto sculpting sins
as Errol Brown once said "Everyone's a winner baby"

thats the truth

I ARE NERD
Respect
P.

Progress at last..albeit shaky...Bladerunner Blaster - quest for glory

When things were finally dry enough for me to tamper I leapt upon the chance to continue my labours in pursuit of my PKD Blaster, it's time for THE UNDERCOAT OF DOOM!

I've decided to give all the 'metal' parts a chrome undercoat, that way if it gets dropped, knocked or chipped it'll only add to the realism with some shiny metal showing through..at least that's the theory

First off was to mask the handgrips..they'll be another colour - undecided as yet.


and so to the spraylab....


mmmmm  shiny...

However the lovely, flawless chrome finish highlighted my inability to properly prepare the raw surface, there's some nasty looking plastosculpt crimes here...hmmm


UGH! not good...well that's to be taken care of hopefully a bit later. In the meantime the 'revolver' parts I've plasto'd over also ended up looking the worse for wear, but ever the optimist I seized upon the chance to MODIFY and IMPROVE...creating a template for some overlays to mimic detail on the original prop.


It came out pretty well, overlaying two layers of cut-out plastic from a shaving foam cap and superglueing the buggers on...


roughly similar to this detail...I said roughly!!


there's also one for the other side but more on that later...so that's pretty much the progress for today up to date, just a last picture to show a roughly half assembled, incorrectly painted work in progress, makes me happy


oh and I've also been working on these for when the gun is finished and ready for display...eventually


until next time

I ARE NERD
Respect
P.