Wednesday 26 January 2011

Mini Boba Fett Intergalactic makeover

Whilst doing my last mod project on the Hasbro Boba Fett Blaster I remembered my 1/6 Boba Fett that was languishing in a box under the stairs for 2 years...
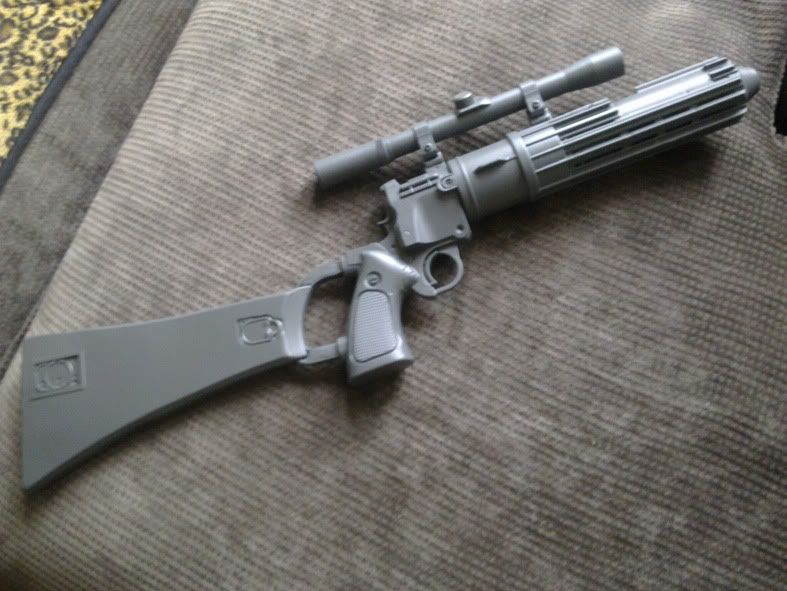
First of all it was just to use up the paint I'd mixed on the mini Boba blaster

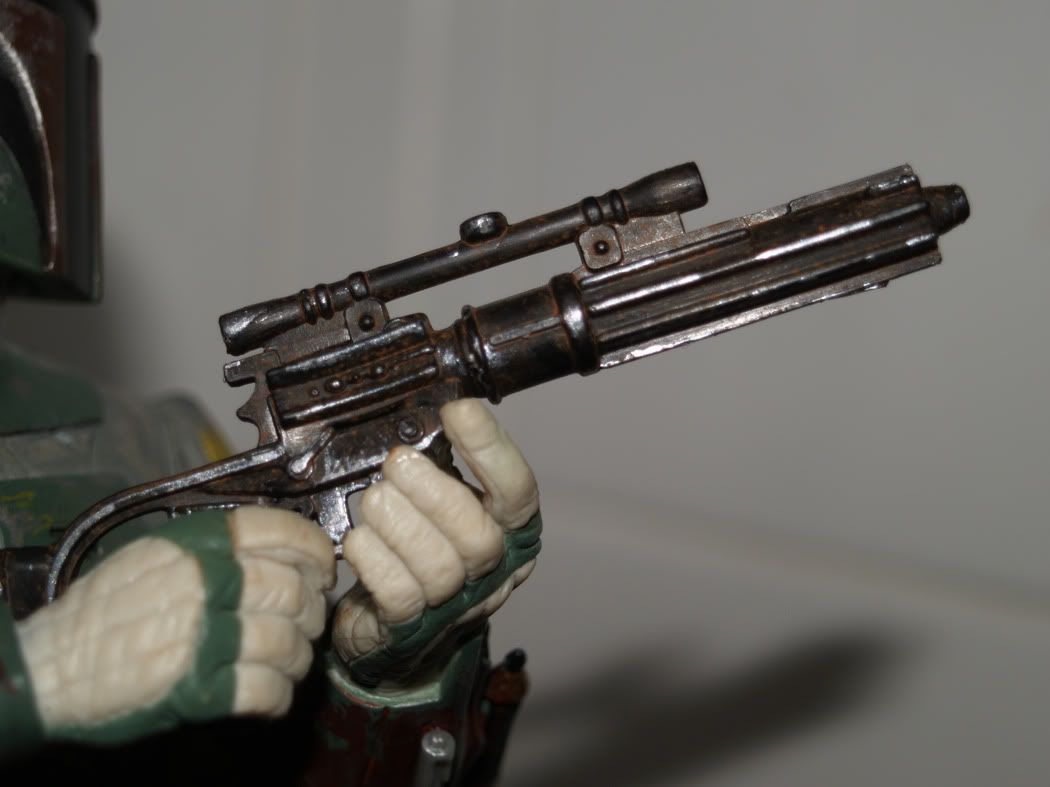
Then I got to thinking...why not finish the whole thing off?....So I kinda have.
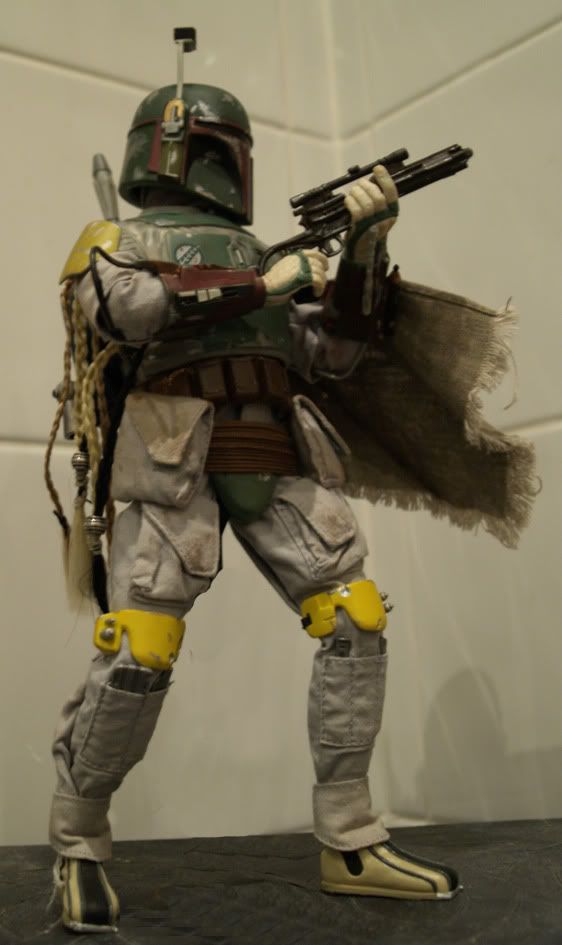
The original idea was to put a Dragon models body, new hands, replace the feet etc...but I'd run into a dead end then and so decided now, to go with what I've got.

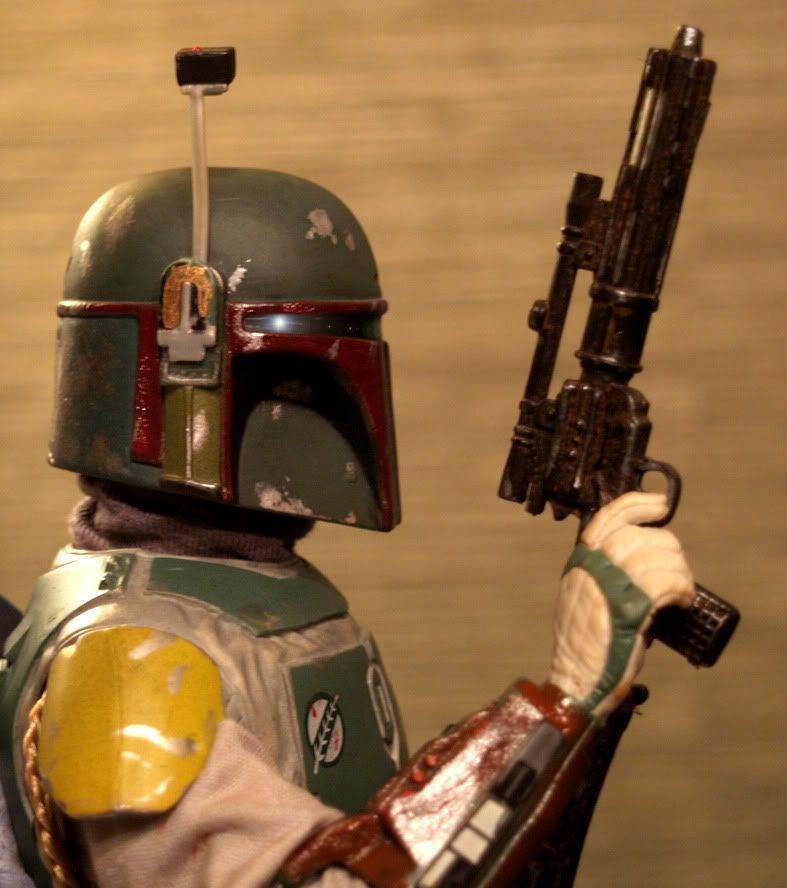
So it's a Dragon head (James) on the original Hasbro body and a repaint of some parts.


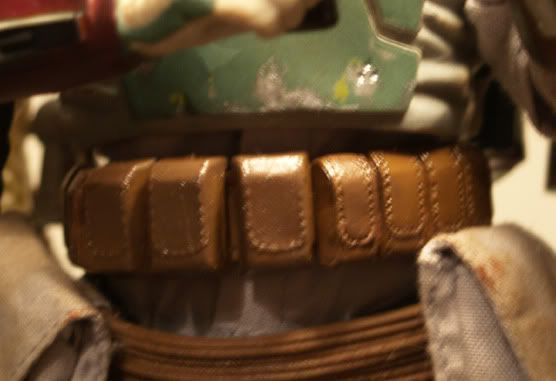
I had the vintage 70's 12" fett and scalped the pouches to fill the inexplicable gap in the later (1992) Hasbro ammo belt - superglued and repainted the whole belt

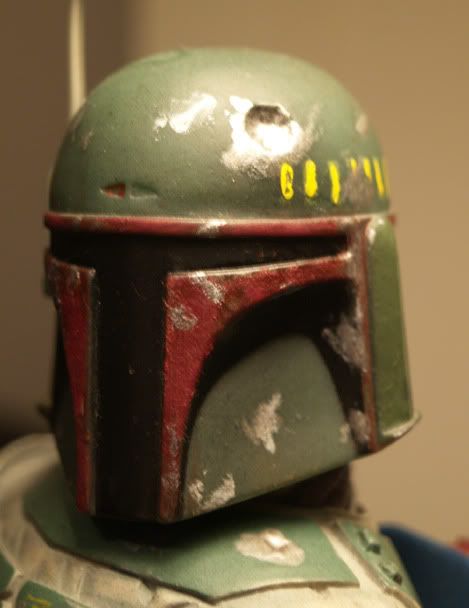
a repaint for the red and chromed chips on the helm and gauntlets...


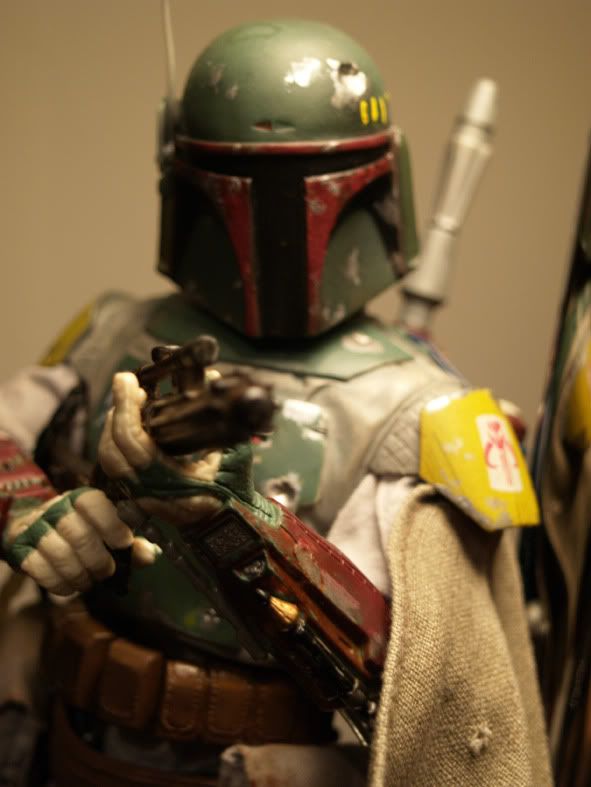
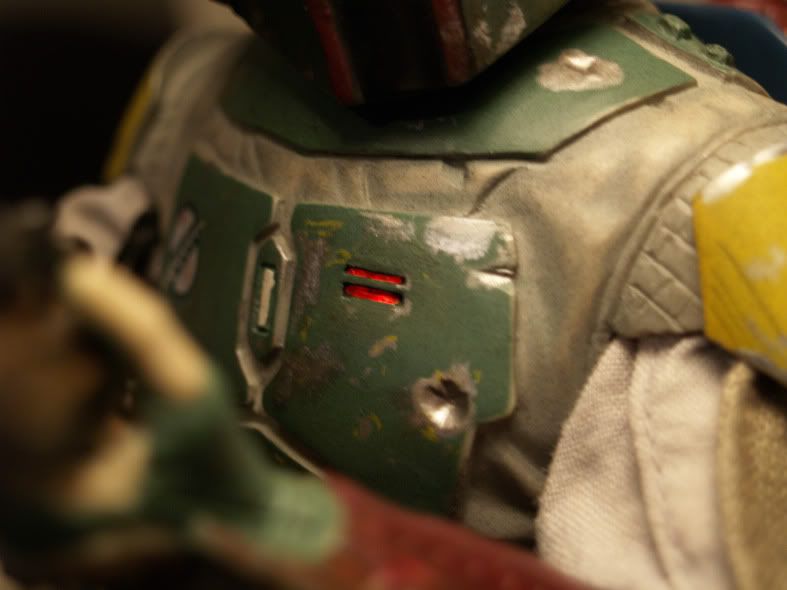
painted in the LED chest display


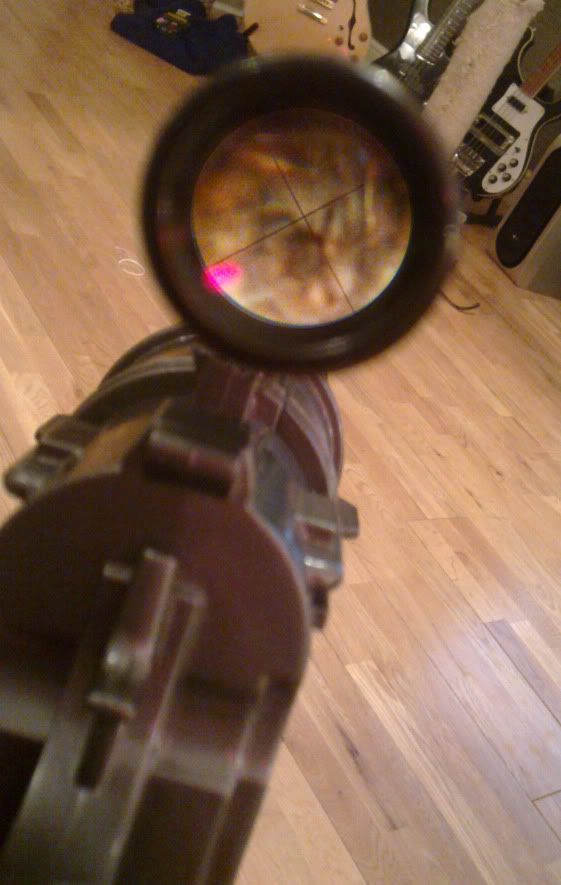
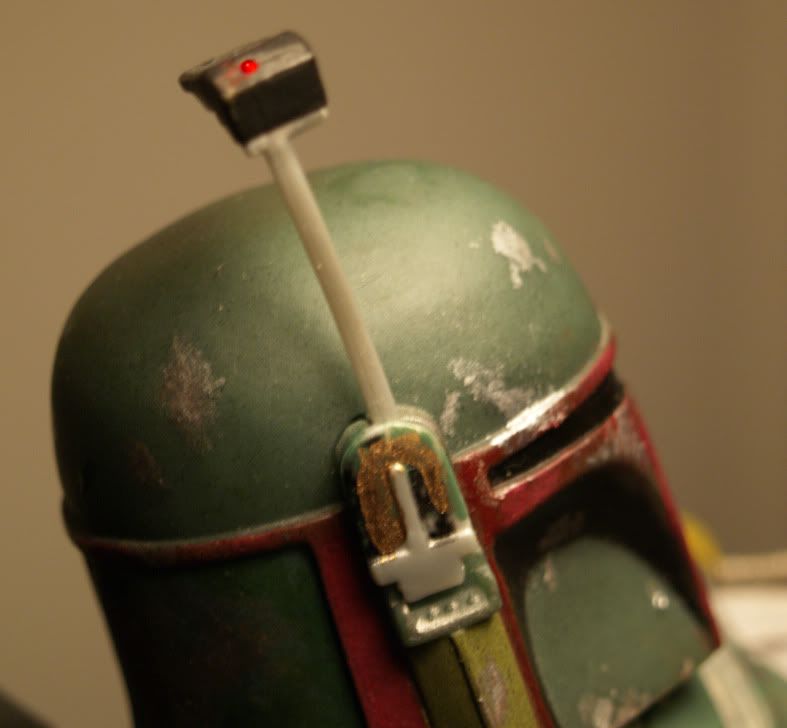
and a touch of brass and thge red light deatil on the ear cap and rangefinder


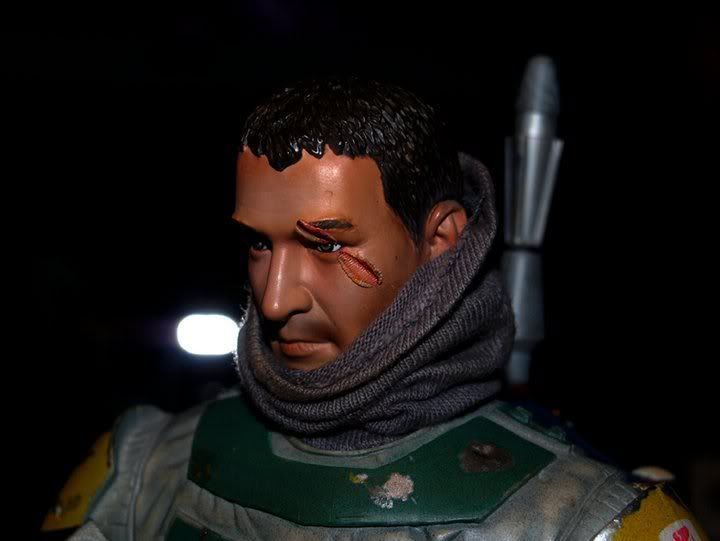
and finally heres Boba (James) Fett without his helm - scarred by a red hot screwdriver :D


Some other details worth mentioning are the added pipes from the gauntlets to the sleeves and the neck/head cowl from Dragon's Zanis. But details schmetails, isn't he cool?


I ARE NERD
Respect
P.

Thursday 20 January 2011

I have you now.....

I know it's a lot to take in on one day but...

Finished, weathered, rusted, chipped, knackered, been through a lot....I present to you...
El Barone's Hasbro Boba Fett EE-3 Blaster Mod - Complete.....


Pretty cool the things you can acheive with a toy, some putty and some immature enthusiasm right?

I ARE NERD!
Respect
P.

Almost there, stay on target, stay on target....

This Project is now in it's closing stages, also the most critical one, so I'm gonna take a day or two to research the proper techiques for weathering to give it a dirty, scuffed up, rusty, battered old weapon of intergalactic death type finish.

The bugbear, the stock - is DONE!! (applause please) thankyou, thankyou.

 After the genius that was plasticard, I filled and sanded the last niggly bits and proceeded to the undercoat stage...


 It then occured to me that the stock greeblies were now looking too 'buried' so again, turning to my old friend plasticard, I cut out two frames to sit on top of and around the rear greeblies and bring them back into play, with a more raised feel...


When the undercoat and topcoat have been applied it looks way better than previously...


so now, here's how she looks as of now, this is pre-weathering so it's new and shiny looking. But that's soon to change muwhahahaha (evil bounty hunter style laugh). The grey is actually much much darker than it appears in the photographs. But that's mobile phone photography for you.


It may not be perfect for those of you out there that can only live with the exact replica of the movie version (which incidentally looked pretty cheap shit under scrutiny) but it certainly is keeping my inner bounty hunter happy. once the weathering is done it's gonna be pride of place in the Baronial sci-fi movie museum.


In the meantime, here's how it looks to a bounty hunter when he sights his prey. In this case Aitor the scourge of the spaceways (and food bowls everywhere)


I ARE NERD!
Respect
P.

Wednesday 19 January 2011

Desperate times sparks genius....EE-3 Fett Blaster...moving again!

okay so todays progress is as follows...

primered and undercoated (metallic auto-paint) the front half, I'm leaving the stock as is for now..you'll see why in a minute
the add-ons and fill-ins are nicely vanished with a lick of paint...


Whilst I was painting and despairing about the stock, it hit me, why not make a template out of plasticard to cover AND strengthen the stock? So I scanned the blaster and photoshopped up a rough template to cut out...


Then using trusty superglue attached the cut out plasticard cover...it's a little rough but I'm thinking with some sanding and a bit of filler it could potentially work nicely...


 So, glued, sanded and primed...priming has highlighted some areas for a little filler/attention but overall it works!! hooray for desperate measures!


Next steps...fill the little 'niggits' sand, primer again, lightly, undercoat then it's time to start the prep for the final paint job touches.

I ARE NERD
Respect
P.

Wednesday 12 January 2011

Proud of yourself, little man?

Whilst awaiting inspiration and materials to continue building the hand grips I've not been lazy...much...

With help from some great folks over at propsummit I've tentatively drafted the frame for the grip. It's potentially a goer in some 1/2" wood but until I've decided on material for the actual grips themselves I'm holding fire on cutting it.


So in the meantime, to not lose momentum/excitement I've been busy with some minor beautification.
The double trigger is an iconic part of the design so I got that sorted fairly easily.


They won't function as such but are pretty sturdy against the attack of curious fingers..
My mini pipe cutter arrived today too so I set about cutting down the barrel insert I've already started on..


The issue here is that the pipe is barely 1mm thick so needs to be fattened up somehow to look more badass..two options present themselves now the first is my trusty rubber washers...


or this cheeky little leftover from a mini scope..it has a lens so looks quite cool, if not screen accurate (so what?) not sure which to go for yet though....


With the backup blasters sitting in thier packaging still it struck me that I could cut out the half laser sight on it and also on my hero I'm working on and by carefully sanding and cutting could put the two halves together to create a more 'standout' rod...


and lastly for now, the two halves after a few coats of primer...much better...


more to come...so much more...

I ARE NERD
Respect
P.


Saturday 8 January 2011

Space, guns, space, guns, robots, brooolooooo....

You know how it is you wait ages for one science fiction weapon conversion project then two come at the same time...here's how it stands so far with the two projects on my intergalactical robobench. First the continuation of the latest Blade Runner blaster project.

I've got brave...having 2 backups helps but I ot brave nonetheless. After trying out some other grips from different plastic shooters I took my trusty, thumbslicing scalpel and hacked the entire bugger off.

half  Beretta idea...mmm...nope

Hogue style grip overlay....mmmm, well, mmmm...naaah

off she comes..

so now the idea is to fabricate an inner frame and somehow, mould, carve or hand sculpt a more accurate set of grips..the inner frame will be based on something like this....


The next bold move inspired by stong black coffee and too many cigarettes was to cut out the moulded plastic barrel and replace it with some metal tubing...
First..out comes the offending section..hack..hack...


Then after a quick visit to the local garden centre and with the aid of my eagle eyed wife we found a corrct sized metal tube and after cutting of a workable length...in she goes...


I'm just waiting on a pipe cutter to be delivered to trim it to the correct length. As you can see from the above photograph whilst removing the barrel I had to also remove the bottom support detail, but with the help of an old plastic filter from an E-cigarette and some patience, that was quickly replaced.

Humble E-cig filter gives it's life for a higher purpose...

From simple earthly filter to super hi-tech blaster barrel support

So that's where things stand with that at the moment. The other project - Boba Fett's ROTJ EE-3 Blaster - has been gathering dust over the holiday period, partly due to alcohol and poultry intake and partly due to my dissatisfaction with how the work is going on the buttstock. I'm hunting for a decent sized 'real' wooden stock to replace the tiny flimsy plastic one with due to it's general poor quality. BUT...the postman came today bearing gifts...


and with a bit of fiddling around my EE-3 is now fully scoped out.


How cool is this?....

Until the next time...
I ARE NERD
Respect
P.